Chapter 1: Understanding Your Instrument & Reed
IN THIS LESSON:
Learn about your reed and it’s parts
How to prepare the reed to play
Crowing the reed
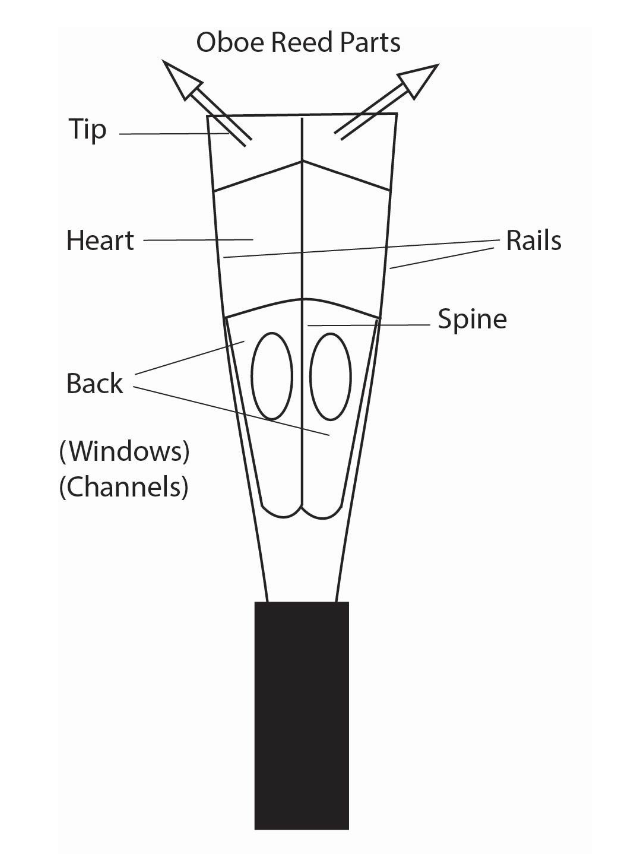
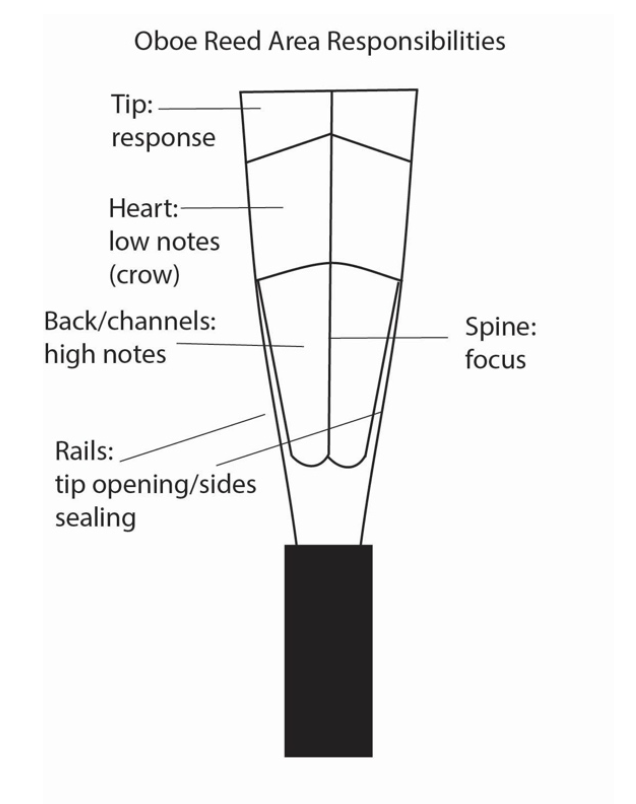
The Parts of The Reed
Knowing the parts of your reed is the first step to reed care. For now, learn the parts of the reed by name, and what they are responsible for controlling by using the diagrams to the right. This information will come in handy down the road. In a later lesson, we will look at some of the basics of reed adjustment.
Reeds are made of cane and are very fragile and finicky. Be extremely cautions whenever you are handling your reed!
Beginner Reed Brands
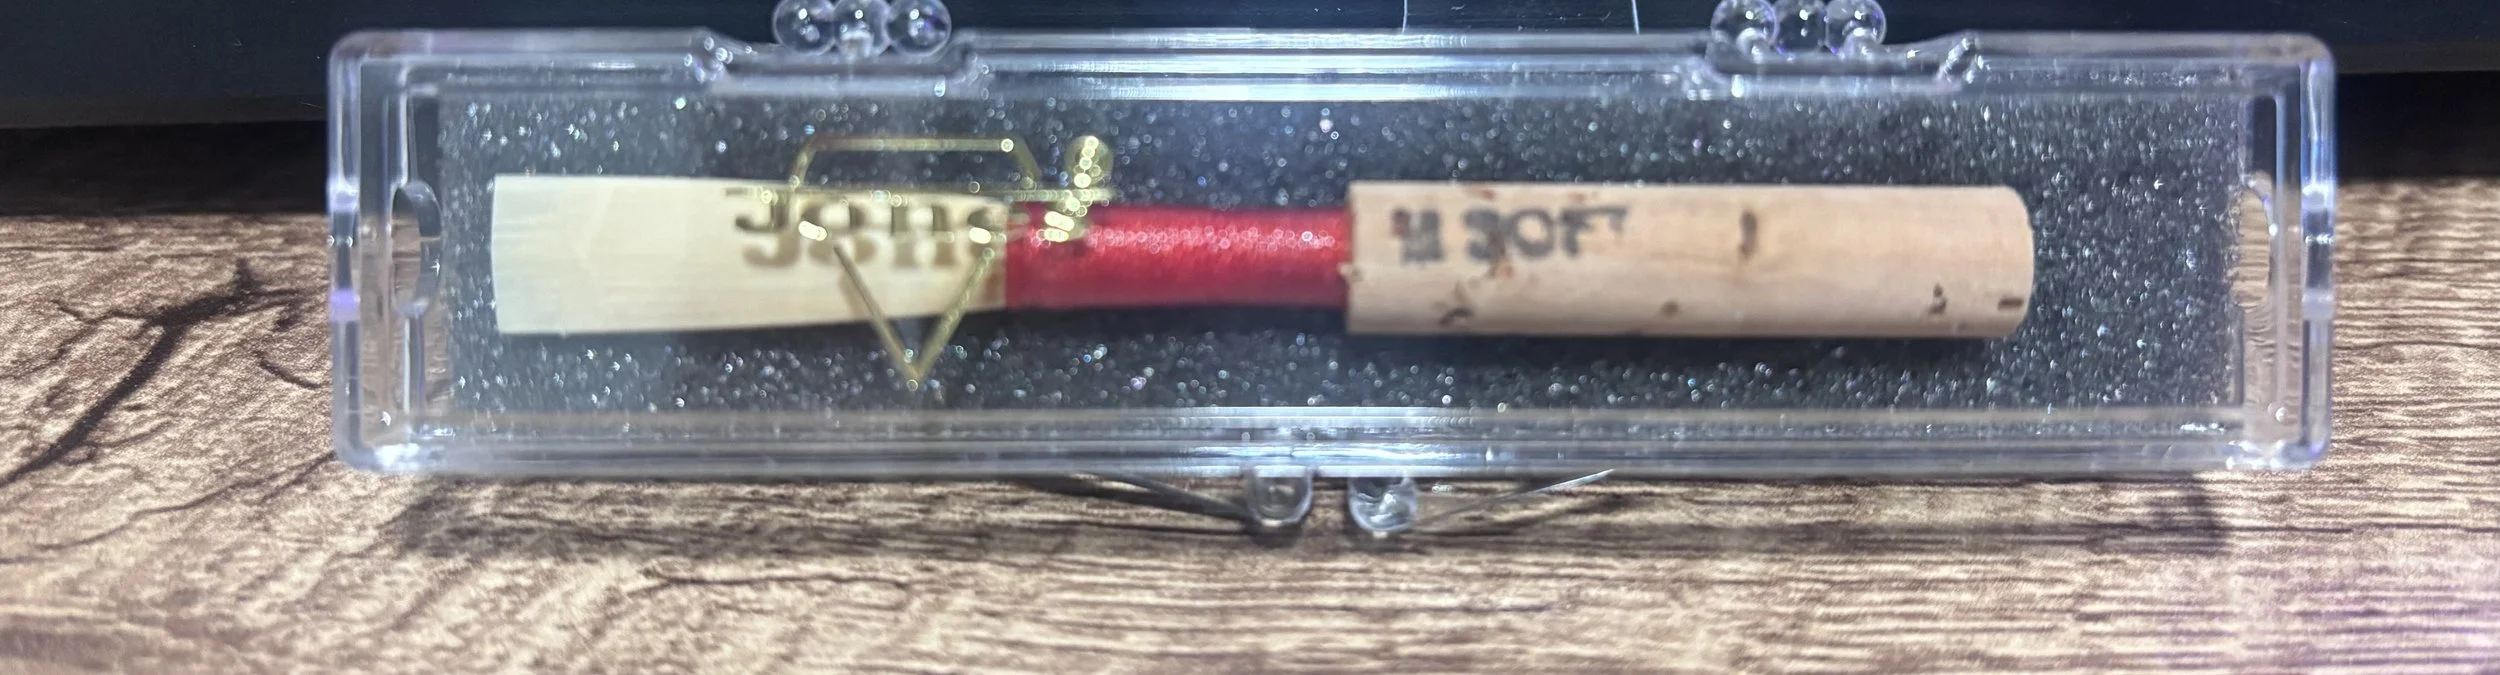
If you are just starting out, you are likely playing on a store bought read, which is okay for now. Ideally, look for Jones Reeds, as they are a trustworthy retailer for student reeds. Other good options would be Emerald or Fox Brand Reeds.
Start out on a Medium to Medium Hard Reed. If you already have a reed, but are not sure what strength it is, look on the cane for printed text. Jones Reeds print the reed strength on the cane (the one shown to the right is medium soft).
If possible, have at least THREE playable reeds on a “rotation”. Rotating two to three playable reeds during your rehearsals and practice sessions will help increase the life of your reeds.
Preparing to Play the Reed
In order to play the reed, we must first follow some important steps to prepare it to play.
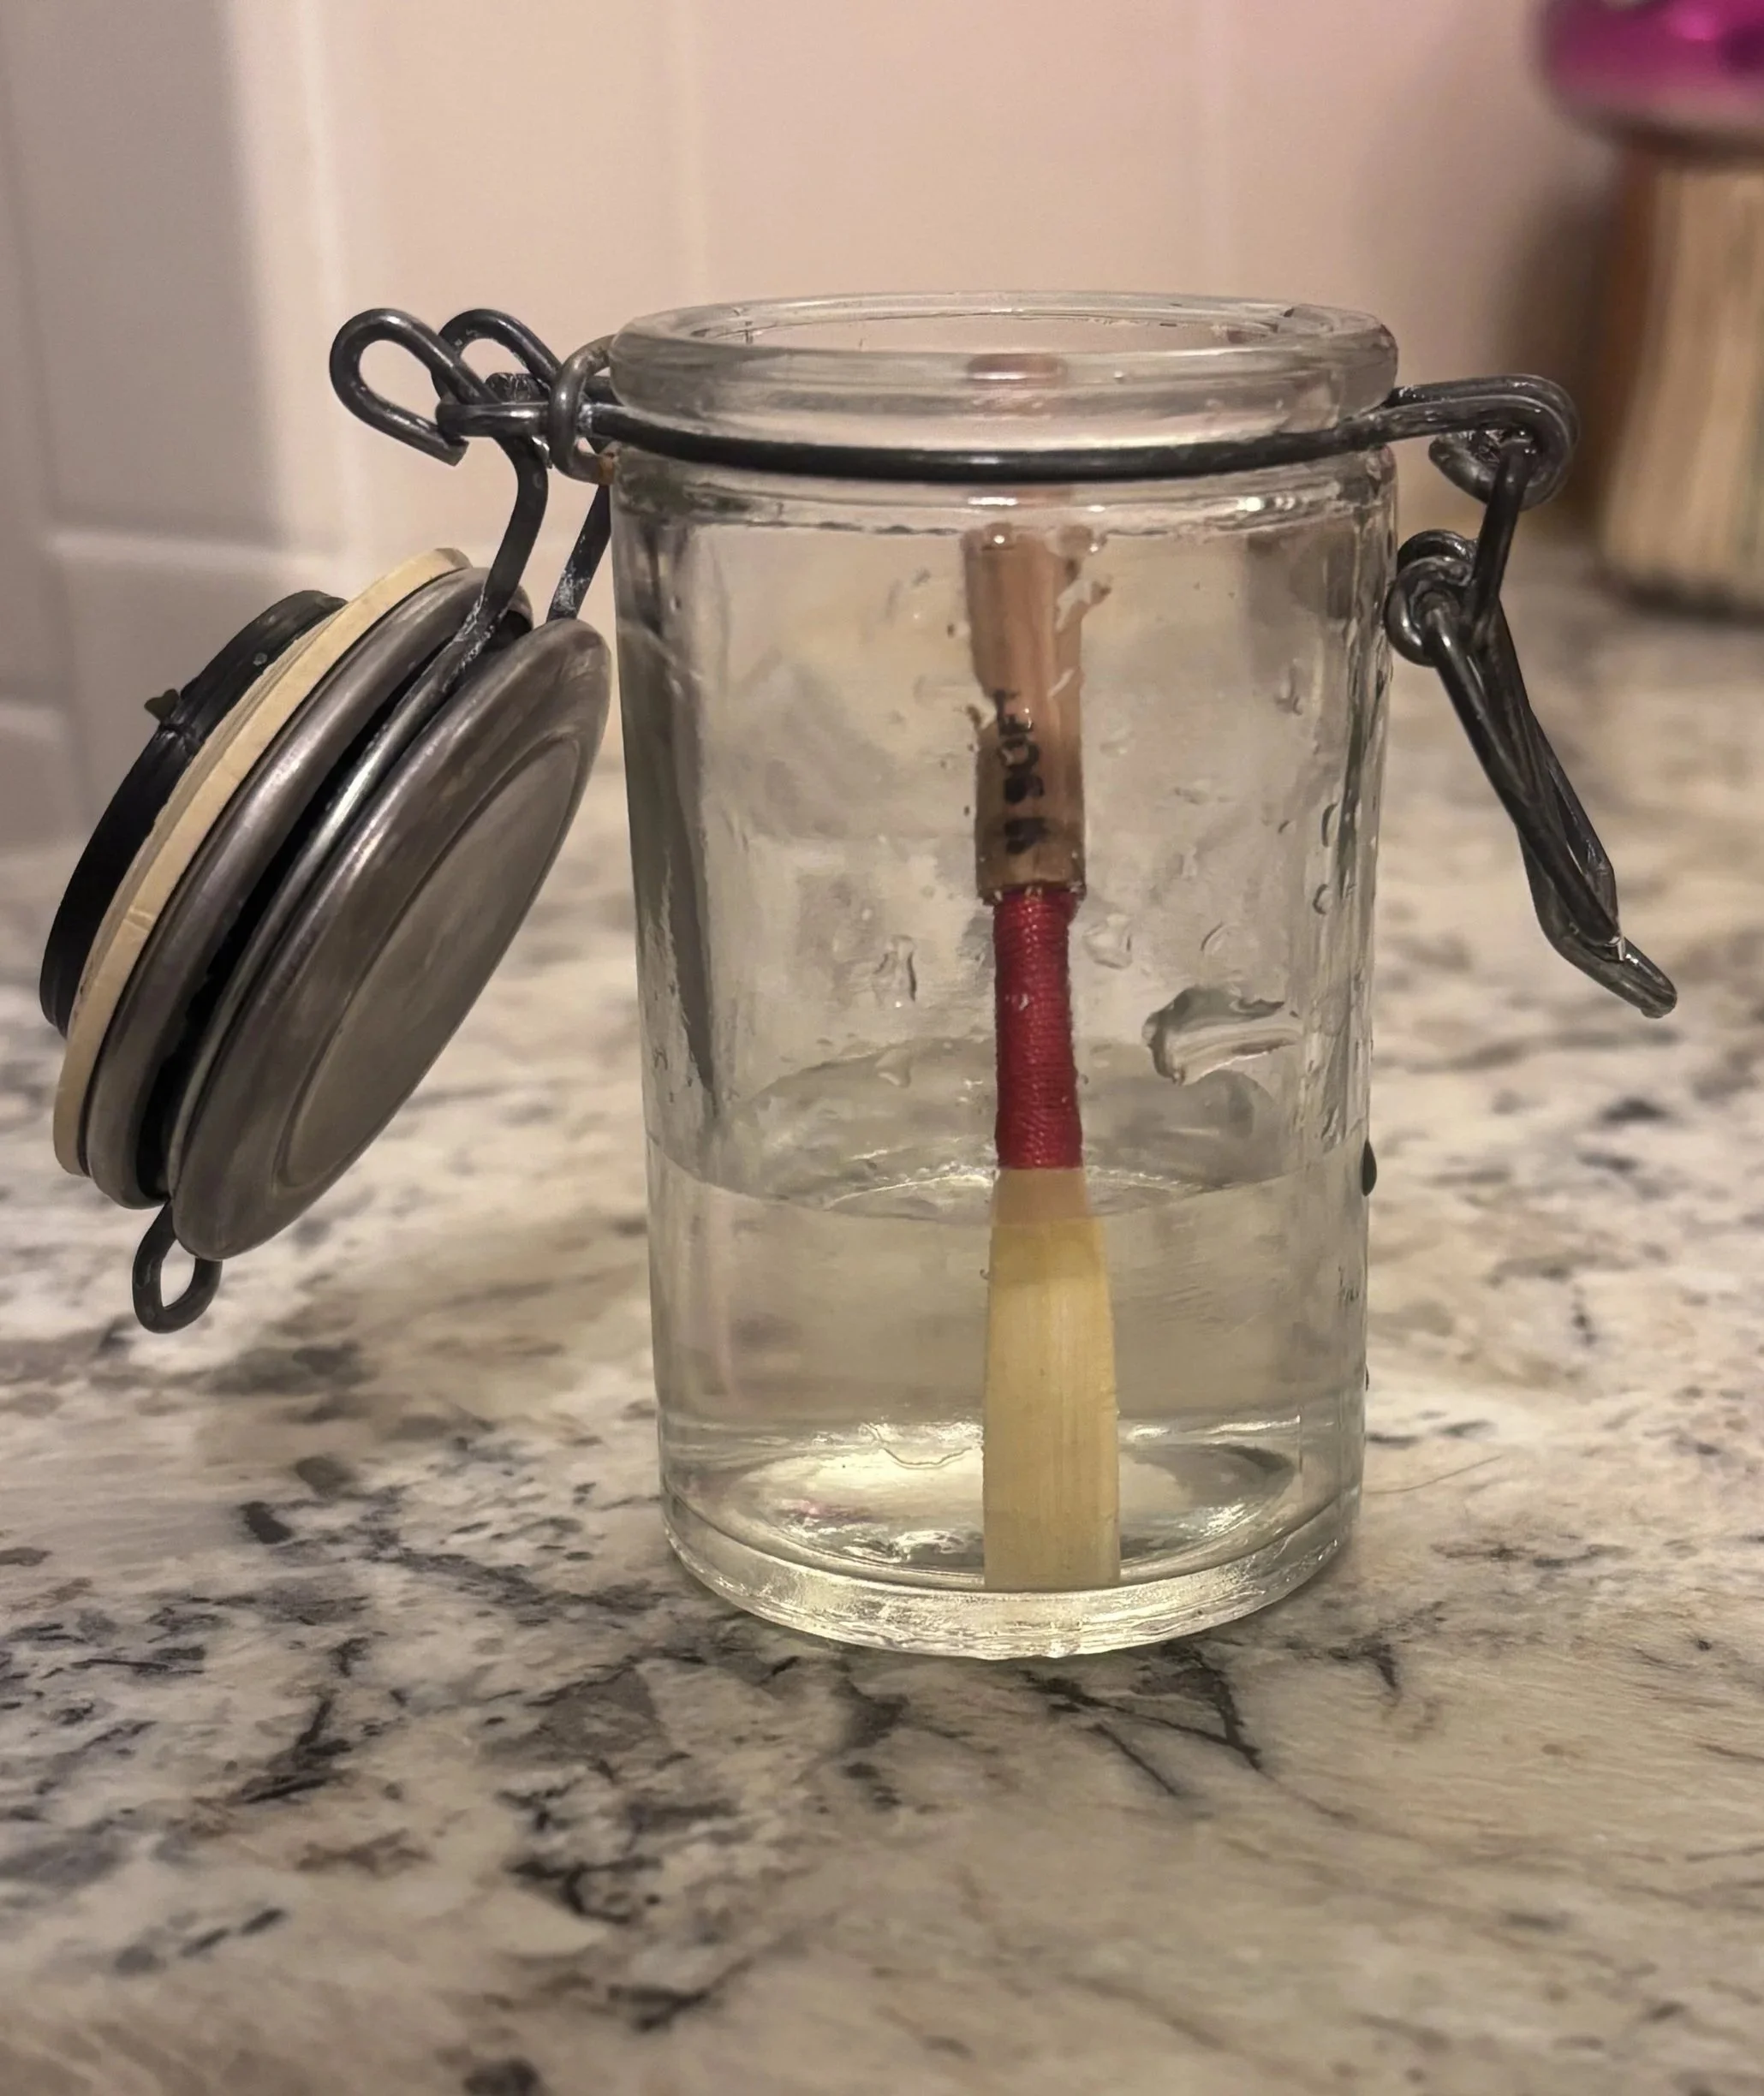
Grab a small cup in which to soak the reed (clear works best so you can see the water level).
Next, fill it up a bit with room temperature water
The water should not be too hot and should definitely NOT BE COLD!
Then, place the oboe reed into the water, fully soaking the cane, but AVOIDING soaking the thread.
If you need a bit more, just add some water up to the thread. If you need a bit less, dump some out until it is just below the thread.
Mark your water-line with a sharpie on the outside of the cup for future reference.
The reed needs to soak for 2 minutes, so you will want to get in the habit of doing this first when you set up your instrument.
The reed MUST soak in water - nothing else. Holding it in your mouth is simply not sufficient.
DO NOT over-soak the reed! An over-soaked reed is a very sad (and probably very ruined) reed … :(
Once the reed is soaked, you are now ready to learn how to tell if your reed is ready to play!
“Crowing” on the Reed
It’s a Bird… It’s a Plane… NO - IT’S AN OBOE REED!!!
Alright, I’ll admit that was a bad joke, BUT, do you know what is not a joke? Crowing on the Oboe Reed. Yes, You heard that right! This technique will help us determine if our reed is of good quality and in playable condition. Follow these steps below to crow your reed. Check the example to the right to hear what proper crow should sound like.
Place the reed carefully into your mouth, with your lips all the way onto the top of the thread.
Blow directly into the reed, which will create a very distinct “rattle” - which is your airstream vibrating the reed. This is the raw sounds of the instrument, and the Oboe simply amplifies and resonates that sound.
The ideal pitch for this crow is somewhere between a B4 and C5. Use a tuner to help determine if your crow is the correct pitch.