Chapter 1: Understanding Your Instrument & Reed
IN THIS LESSON:
Learn about the parts of your oboe and where to place your hands.
DO NOT pick up your Oboe yet - this lesson is just to prepare you for the next steps.
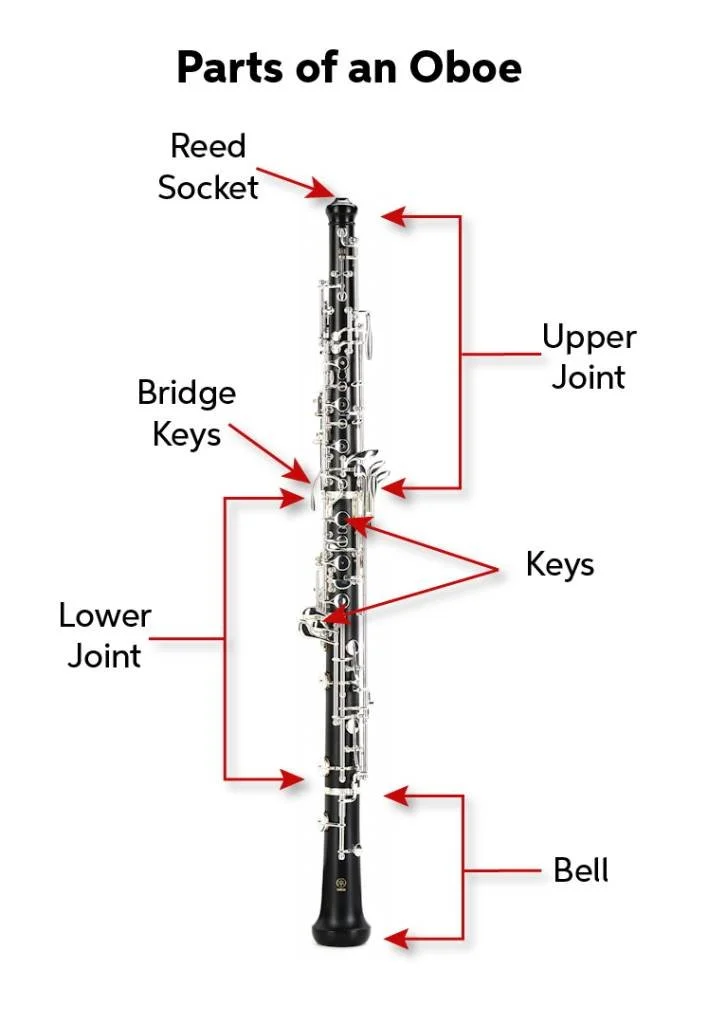
Parts of the Oboe
The three primary sections of the Oboe are the Upper Joint, Lower, and Bell
On the Upper Joint, you will find the left hand hand keys and pinky keys, as well as the Bridge Keys (these keys are especially fragile, so be careful!). The Reed socket is where you will put your oboe reed. For now, do not worry about the reed and leave it in its case.
The Lower Joint is where you will find the right hand keys and pinky keys. The bell is the last piece of the puzzle. For now, keep everything in it’s safely case - we will learn how to assemble it in a later chapter.
Key Names
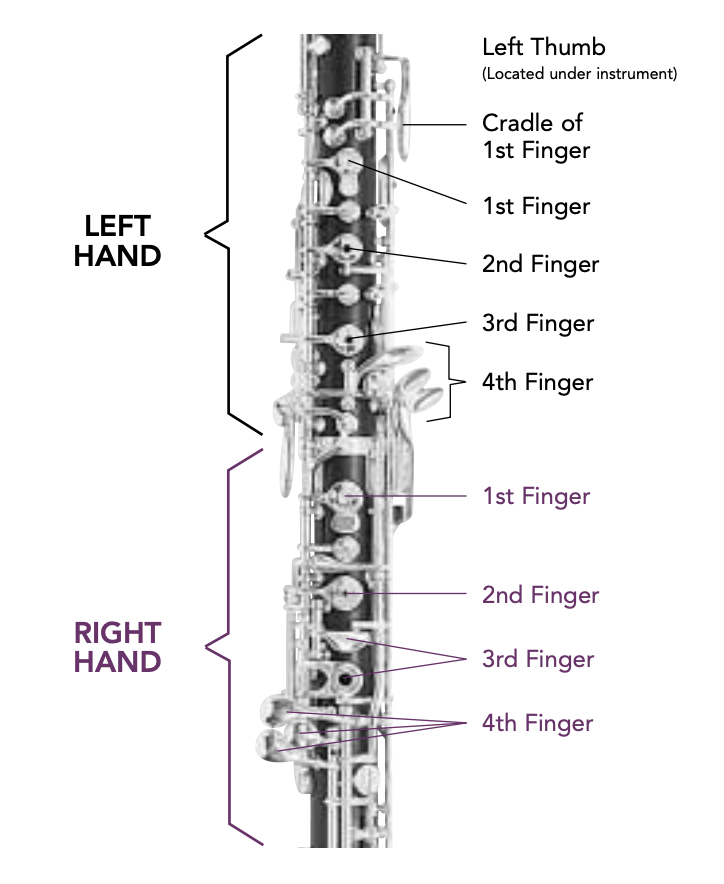
Do not pick up the oboe yet, as we will cover this in a later chapter, but use the diagram below to get familiar with the instruments keys.
The diagram shows the names of keys - use this as a reference when learning hand placement. Take note of the left hand (LH) and right hand (RH) “1, 2, 3” keys, as these are your “home keys” where your fingers will hover, ready to push down keys when necessary. Your LH and RH pinkys should be hovering closely to the LH and RH pinky keys. Your left hand thumb will rest horizontally underneath the register key and your right hand thumb will rest underneath the thumb rest, right about on the cuticle of the nail.
Again - don’t pick up the oboe just yet! Let’s wait until the chapter 3.